Showing posts with label accessory. Show all posts

Sunday, December 27, 2015

How to Make a Doll CD Case!

Today I will show you how I made the AIO CD case that Beth got for Christmas! It's an easy craft that turns out super cute, and you probably have all the needed items already!


Tools I used:

- Xacto knife (to cut the cardboard, but you can also use the scissors to do this)
- Scissors
- Printer
- Paper
- Cardboard
- Glue Stick (or other type of glue, but this worked well for me)
- Masking Tape

 
First, find an image that you would like to use for the front cover of the CD case. I found mine by doing a quick Google search. I was able to find JPEGS of both the front and the back of the CD case. I printed the images to be about 2 inches wide.
 
Also, print a strip of solid color that matches the front cover image. I was able to get the exact color using the eyedropper in Microsoft Paint. The color strip should be 1" by 11", or 2" by 5.5" cut in half down the middle.

 
Cut out the images.
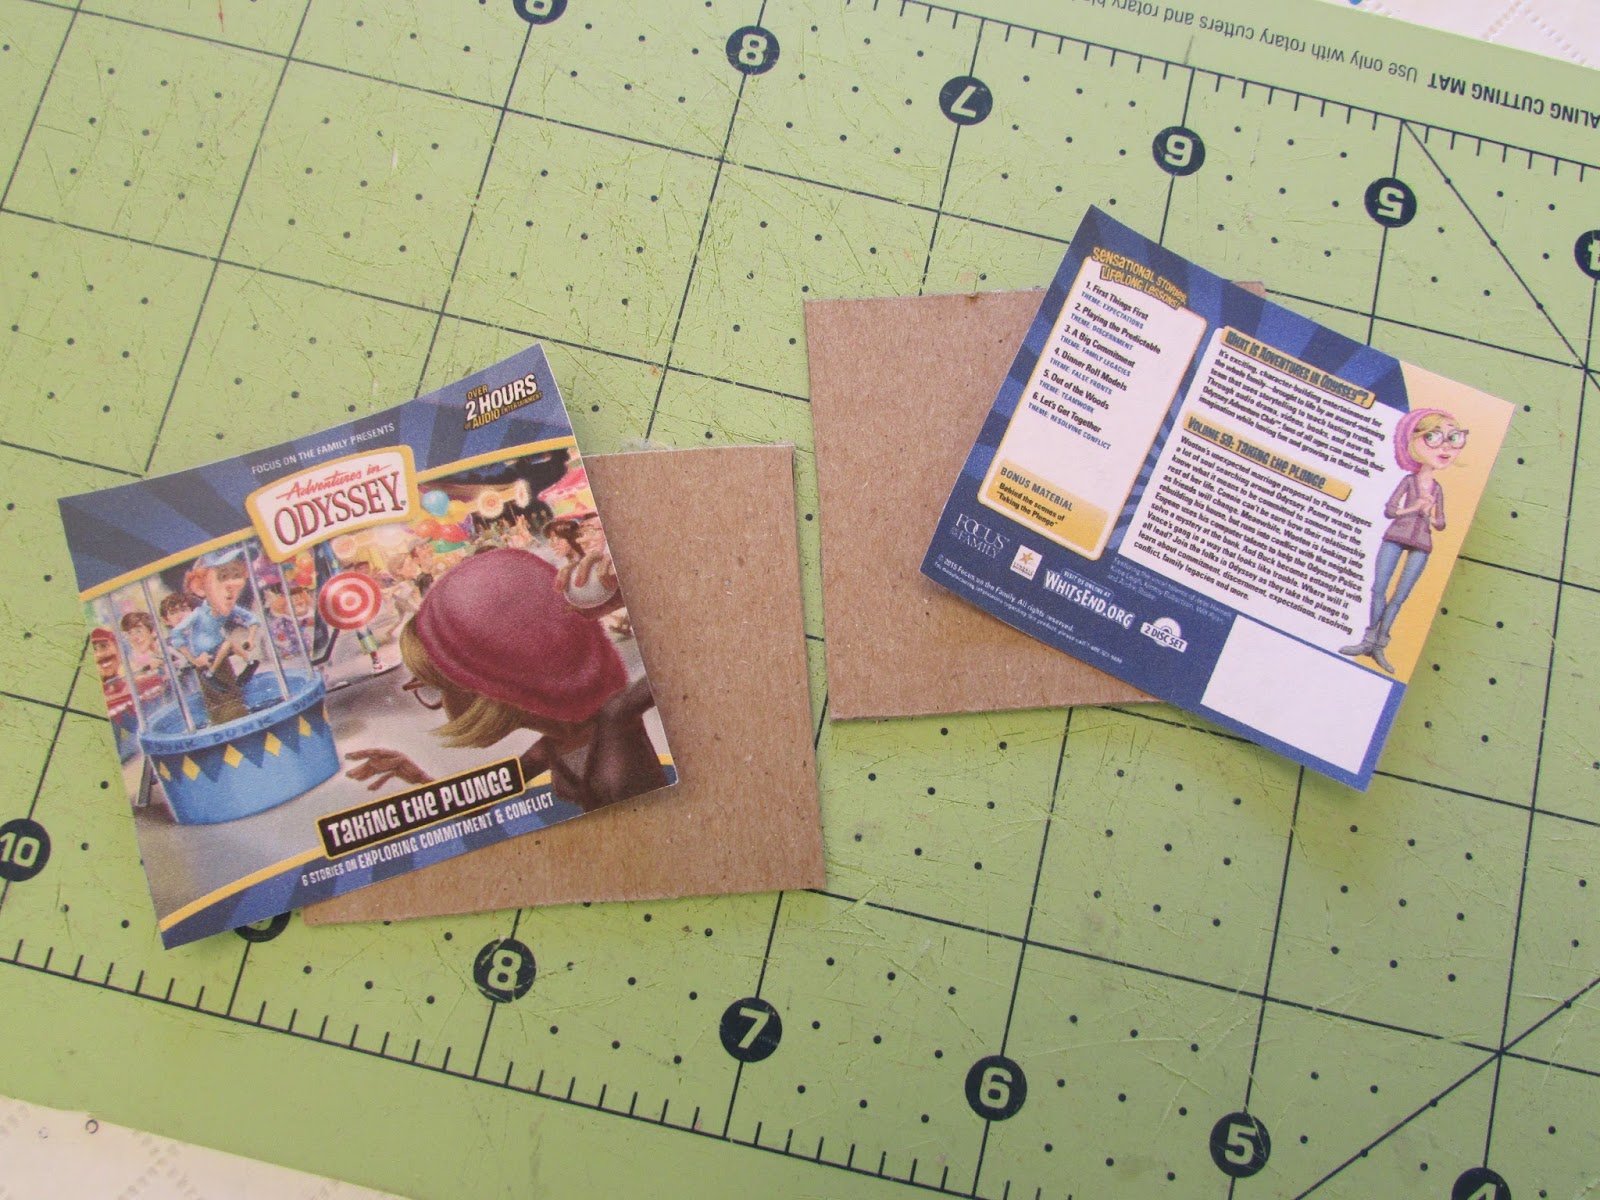
 
Next, trace the images onto your cardboard. I needed to do this three times, so that each piece glued on the next would make the CD case about 3/4 of a 1/4" thick. So, basically, almost 1/4" thick.
 
Glue the cardboard together so you get this:
 
 
Now take your strip of color. It should be about 1" by 11", but I had that was 2" by 5.5", so I just cut it in half down the middle.

 
The other images will cover up the front and back of the cardboard, but the color strip is to cover the sides. Glue the sides of the cardboard square and attach the paper, folded it carefully at the edges.

 
Do this all the way around.

 
The sides are covered!

 
Glue the front cover image to the cardboard.


And the back...

 
This is optional, but I had an extra copy of the front and back images (which I originally printed to test the size). Therefore, I cut out where it said the title of the album "Taking the Plunge" on the extra copy, and glued it to the side of the CD case to add detail. 


To give it a shiny CD case look, I covered the front and back with masking tape. I laid it sticky side up, then set the album on the tape. I then cut the tape, and then fit it to the size of the image with scissors. Or, you could just cover the sides too, but I just wanted to cover one side, the front, and the back.

 
Finished front with masking tape:

 
Finished back with masking tape:

 
The finished CD!


Sunday, November 8, 2015

Making a Doll Fireplace

With cold winter days approaching, I was inspired to create an American Girl Doll sized fireplace! I had been thinking about doing it for some time, and am super happy I finally got around to it.

I took progress pictures of how I constructed that may help you if you decide to make a fireplace for your dolls. I apologize for any poor quality photos, I usually do crafts at night time :)


For the basic structure of the fireplace, I used a Christmas lights box that measures 8 1/2" by almost 9 1/2". I turned it sideways, so the longer side of the box would be the bottom of the fireplace.
 

I then cut out a section of the front for the opening where the "fire" would be. The completed opening measured about 5" by 6 1/2".

 
For the inside of the fireplace, I printed out a brick pattern on some paper. The brick is a little small for American Girl Doll scale, but that's okay to me. A link to the brick template can be found in the description box of the video by Deena and Beena here. I printed four of these sheets, but only needed to use three.
 
I used scissors to cut the paper so that it would fit on the inside of the box, then used a glue stick to attach the paper to the cardboard of the box. Here it is so far!
 
 
The black part is craft foam cut to the right size. I attached it with a glue stick. One could also use black construction paper, but I didn't have any on hand.
 
 
I used my X-acto knife to cut pieces of craft foam board to cover the design of the Christmas lights box. I covered the front and both sides.
 
 
I wanted to add a little decoration to the front of the fireplace, but I didn't want it to be overwhelming. I took some white Sculpey and rolled it out so it was flat and even. I have a small box made of stone with horses and interesting designs carved into it (picture above). I took this box and decided to use the triangle design. I impressed the box into the clay. When I removed the box, the clay showed the same triangle design indented into it. The first couple times I attempted this, the clay stuck to the box, making a rough looking design. I fixed this by putting a small piece of plastic wrap over the clay. After that, I was able to remove the box, peel away the plastic wrap, and I had a nice design.
 
 
I cut the clay designs to the shape I needed before baking for fifteen minutes.
 
 
For the wood of the fire, I found some small branches of a lilac tree. I cut them to smaller pieces, in order to fit into the fireplace. To make them look burnt, I used soft charcoal and hard charcoal, which is typically used for drawings, to color the sticks darker. I smoothed it out with my fingers and a tortillion. If you would like to read more about charcoal drawing/tortillions/charcoal, see my previous post here
 
 
I cut the foam board for the mantelpiece a slight bit larger than the actual size, so it would over hang a bit.
 
Final pictures!!
 
 
It's got a basic look and design, but I plan on decorating it with stockings and Christmas trinkets.


I glued the clay design to the foam board with some Tacky Glue. I had never used Tacky Glue before. The clay seems to be held quite well into place.


For size comparison I have Maggie in her winter pajamas!


I think Maggie is wondering if Santa will be able to get through it :)
 
Hope you enjoyed!

Sunday, October 11, 2015

Some 'Our Generation' Clothing for Inspiration

Today I went on Target.com to take a look at the Our Generation sets, for inspiration of things to sew or make.  It seems like the Our Generation line has a lot of variety in the kind of things they offer, but a lot of the items online say "In store only".  The Targets that I have been to don't appear to have a lot of variety in the selection of OG items.  Nevertheless, I saw some fun stuff!


Our Generation Deluxe Outfit - Snow Bright
 
Photo from Target.com
 
The 'Snow Bright' outfit is $17.99 on the website.  The Aztec print coat looks very cozy for cold days, and could also be worn with jeans or leggings.  Warm ups are essential for a doll that loves to play in the snow.  They are the best way to stay warm! 
 

Our Generation Regular Outfit - Plaid Skirt
Photo from Target.com
 
This 'Plaid Skirt' outfit is $12.99.  Each piece looks very versatile.  This outfit would be so cute for a Holiday event!
 
Our Generation Deluxe Outfit - Putting on the Glitz
Photo from Target.com
                      
This is the 'Puttin on the Glitz' outfit, which is $17.99.  This dress is so sparkly and would be great for a party.  The ruffle at the hemline is so cute.  I'm not sure if I personally would pair it with the pink tights, but that's just preference.  The hair bows would be great mix n match accessory items.  I think this color would look great on Beth!
 
Our Generation Regular Outfit - Fluffy Sweater
Photo from Target.com
 
This outfit, called 'Fluffy Sweater Outfit', is $12.99.  It is one of my favorites that I saw.  It is so versatile!  Rather than tights like the two outfits above, it has leggings.  The shorts would be great for summer with a light blue, white or pink matching top.
 
Our Generation Rgulr Outfit - PJ's wth pngun
Photo from Target.com
 
The 'PJs with Penguin' outfit looks so cozy.  It is also $12.99.  These are adorable winter pajamas!
 
There were more cute sets, but I'll limit this post to five :) Thanks for reading!
 
 
Disclaimer ~ I am not affiliated with any doll company and 100% of this post is my personal opinion.

Saturday, September 5, 2015

New Etsy Items

Feel free to check these new listings!

Upcycled Red Skater Skirt

Blue Bracelets

Red and Green Bracelets

Thursday, August 27, 2015

What My Dolls are Wearing Today #2!

While it isn't quite fall yet, I've been going through my doll clothes and seeing what my dolls will need for the coming chilly weather.  I put together these two outfits!

The first outfit is on Maggie.  It consists of a sweatshirt, black skater skirt, white socks and black boots.


The sweatshirt is made from Simplicity pattern 4297, sweatshirt B without the hood.  


The skirt is also from Simplicity 4297, skirt A.


The black boots are from Dollshobbiesandmore on Amazon here.  I am not sure where I got the white socks.

Beth wears the second outfit, which is more her style.  Casual and comfortable!


The black sweats are made from the Chuba pants pattern on Pixie Faire.


The pink sweater is also made from Simplicity 4297, this time shirt A.


The boots are from Sophia's, and usually look like this.  For this particular outfit, though, I folded them down to create a different look.


Thanks for reading!