Here is what you will need:
A pattern
Fabric
Scissors
Pins
Needle
Thread
Velcro
Printer
Avery (or another brand) fabric transfer paper
There are two t-shirt patterns I recommend. I use both patterns frequently and they can be downloaded online for free.
The first pattern I recommend is slightly more simple, while the other will take a little more time. The first can be found here from Simply Sweet and Sewn. The pattern has just two pieces, the sleeves are connected to the front and back. This reduces time and effort put into attaching sleeves while sewing. The sleeves, however, are a bit long for a girl shirt, but that can be easily fixed by cutting the sleeve length shorter. This shirt can end up kind of tight in some cases. Keep that in mind ;)
The second pattern has a fitted style with capped sleeves. It is from Pixie Faire and can be found here.
Make a t-shirt using the instructions for your pattern.
When your t-shirt is finished, it's time to find an image to put on the shirt! To transfer the image to your shirt, you will need a fabric transfer sheet. I used Avery Light Fabric Transfers. The version here uses these, and the dark transfers are done differently.
I usually search Google Images for logos or images. You can use pretty much any image, but keep in mind that the transfer will be see through when finished. Your fabric color will show through any area that is printed white.
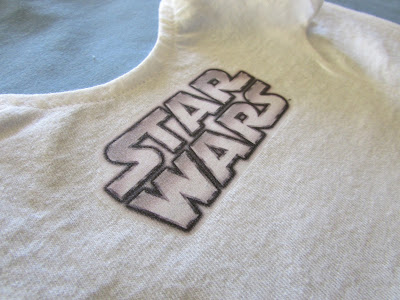
I did a Star Wars logo for this shirt. I pasted the image into Word. Next, I rotated the image and clicked 'Flip Horizontally'. The image will then look backwards, like this:
This is what you want because you will put the image face down on the tee. When the picture is the size you want (mine is 3 inches across), print it out on the transfer sheet.
Cut out the image.
Now, take your blank t-shirt and image to a flat surface to iron on. The transfer paper package recommends using a flat surface as opposed to an ironing board, I think because the image will end up more flat.
Make sure to put a pillowcase over where you will be ironing. Put the shirt out flat and iron it flat.
Position the image face down on the shirt. Make sure it is exactly where you want it.
Iron on the image. The transfer paper I used said to hold the iron down, and not to move it. Make sure every part of the image is sticking to the shirt.
Once you are satisfied, let the transfer cool, as it will be quite hot. After it has cooled, take an edge and slowly begin removing the paper. You will find that part of the paper has adhered to the t-shirt. If it begins to tear, or does not look like it is attached to the tee, iron the spot again.
When you have it removed, you have your very own graphic tee for your doll!
I can't wait to do a photo shoot of Maggie in this shirt! I hope you enjoyed this little tutorial!


Thanks for the information. Cute shirt.
ReplyDeleteNo problem, thanks!
DeleteThis is amazing and super cute and easy!
ReplyDelete-Leah
Thank you and yes it really isn't too hard!
DeleteThanks so much for this tutorial! I need to do this! You did a great job on your shirt! :)
ReplyDelete~Kaitlyn
Your welcome and thank you!
DeleteWow, I love that shirt! Great tutorial, I definitely want to try it out!:D
ReplyDelete-Emma-
Thank you! Awesome have fun!
Delete