

Tools I used:
- Xacto knife (to cut the cardboard, but you can also use the scissors to do this)
- Scissors
- Printer
- Paper
- Cardboard
- Glue Stick (or other type of glue, but this worked well for me)
- Masking Tape

First, find an image that you would like to use for the front cover of the CD case. I found mine by doing a quick Google search. I was able to find JPEGS of both the front and the back of the CD case. I printed the images to be about 2 inches wide.
Also, print a strip of solid color that matches the front cover image. I was able to get the exact color using the eyedropper in Microsoft Paint. The color strip should be 1" by 11", or 2" by 5.5" cut in half down the middle.

Cut out the images.
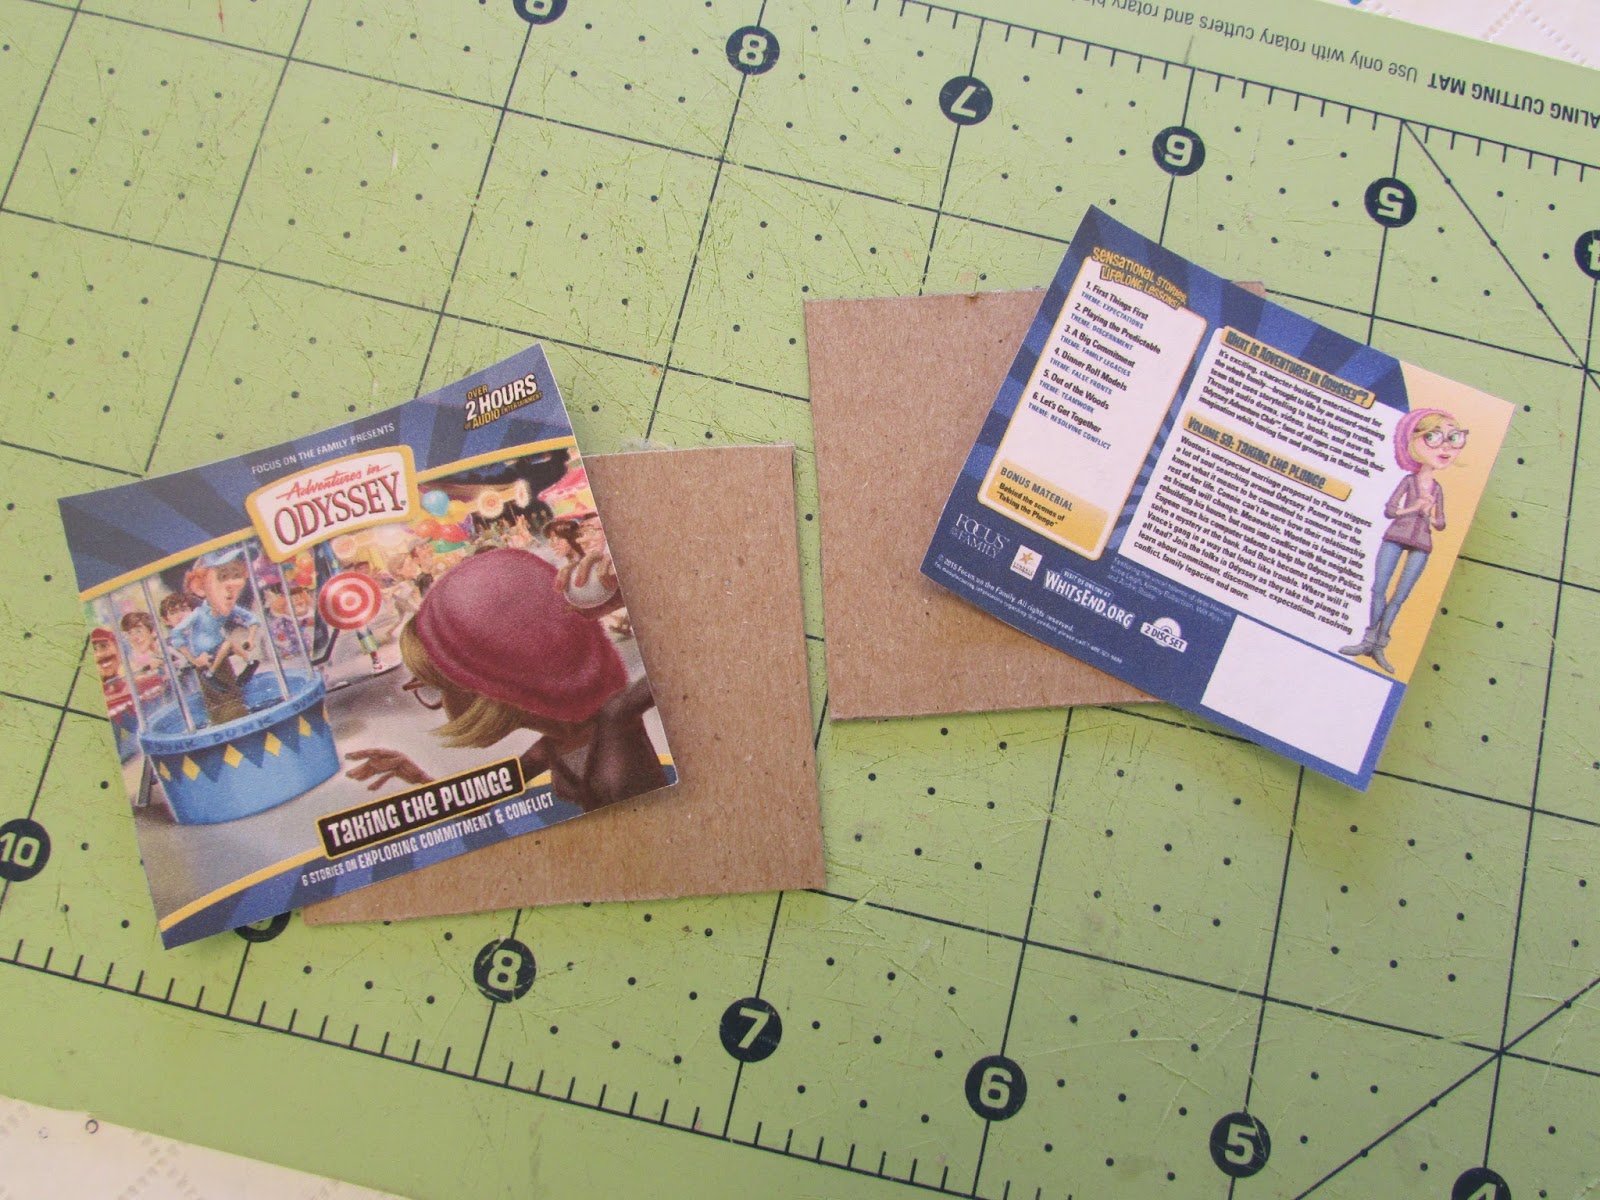
Next, trace the images onto your cardboard. I needed to do this three times, so that each piece glued on the next would make the CD case about 3/4 of a 1/4" thick. So, basically, almost 1/4" thick.
Glue the cardboard together so you get this:

Now take your strip of color. It should be about 1" by 11", but I had that was 2" by 5.5", so I just cut it in half down the middle.

The other images will cover up the front and back of the cardboard, but the color strip is to cover the sides. Glue the sides of the cardboard square and attach the paper, folded it carefully at the edges.

Do this all the way around.

The sides are covered!

Glue the front cover image to the cardboard.

And the back...

This is optional, but I had an extra copy of the front and back images (which I originally printed to test the size). Therefore, I cut out where it said the title of the album "Taking the Plunge" on the extra copy, and glued it to the side of the CD case to add detail.


To give it a shiny CD case look, I covered the front and back with masking tape. I laid it sticky side up, then set the album on the tape. I then cut the tape, and then fit it to the size of the image with scissors. Or, you could just cover the sides too, but I just wanted to cover one side, the front, and the back.
Finished front with masking tape:

Finished back with masking tape:

The finished CD!


How cute is that...it looks perfect!
ReplyDeleteThank you!
DeleteSo cute! I should make some AIO CDs for my dolls....I think they'd like to listen to them. Especially Novacom! :)
ReplyDelete~Christian Homeschooler
Thank you! Beth loves AIO :) It's so fun!
DeleteThat was so creative and cute! I love AIO and this is a great addition to doll rooms!
ReplyDeleteThank you! I think so too!
Delete